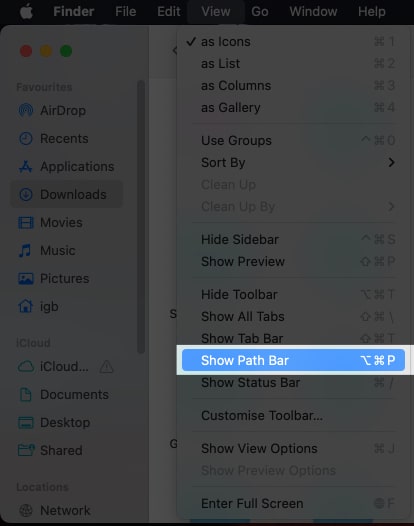
1. Finder Path Bar
The Finder Path Bar is the quickest and simplest way to see a file’s complete path. The whole path to your present location is displayed at the bottom of the window in Finder. Alternatively, you can also use Option + Command + P keyboard commands to Show Path Bar. Plus, use the same commands to hide the path bar or open Finder → View → Hide Path Bar. Plus, you can just right-click and copy the file path. Note: If the Status Bar is visible, the Path Bar will be seen just above it.
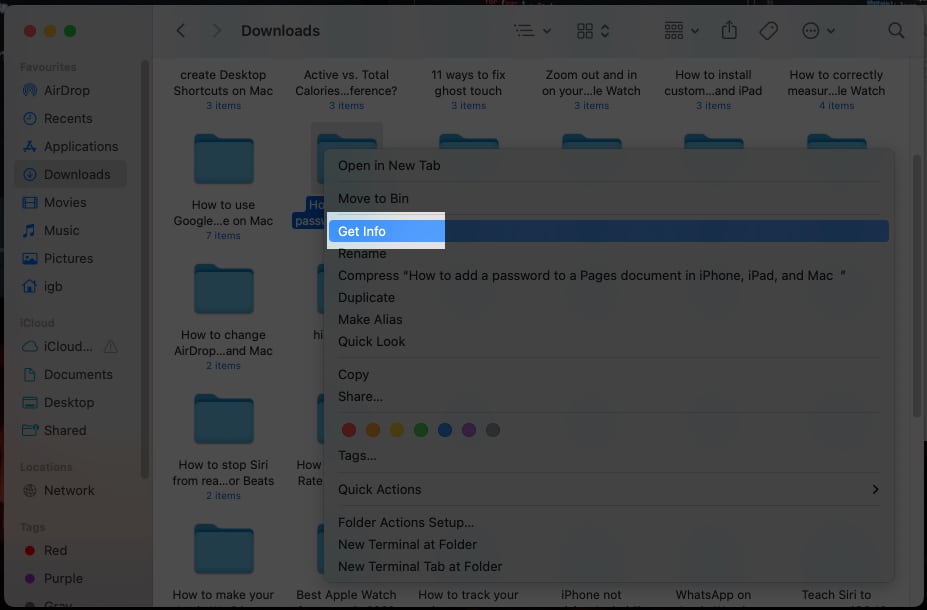
2. Finder context menu
While using the Finder context menu, you get an easy option to copy the full path of the file on your clipboard, which you can later paste anywhere as per your requirements. You can paste the file path anywhere you want to use it. Note: When you’ll press and hold the Option key, Copy will change its name to Copy [file name] as Pathname.
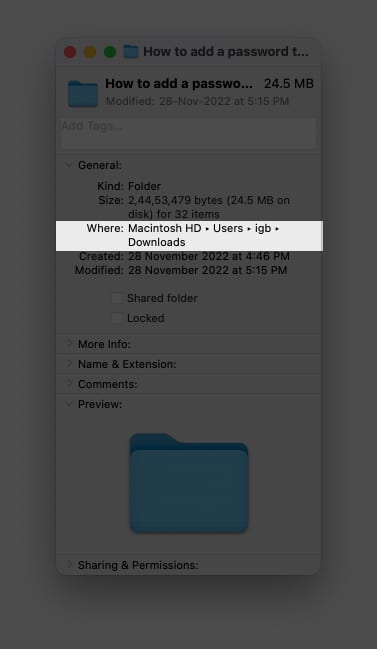
3. Get Info
In macOS, the Get Info procedure displays the file path in just two clicks. Check out the steps below: The file path is now shown in the Where section of the pop-up menu.
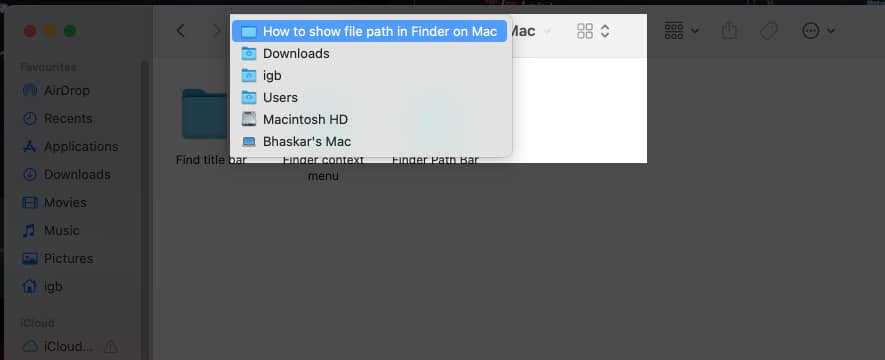
4. Finder title bar
This method can be used for files stored in a folder. You may not be allowed to copy the path while using this option, but the structure provided in the dropdown makes it simple to locate the file. Now, you may see folders or locations in the dropdown menu; you can easily navigate to your preferred location from here.
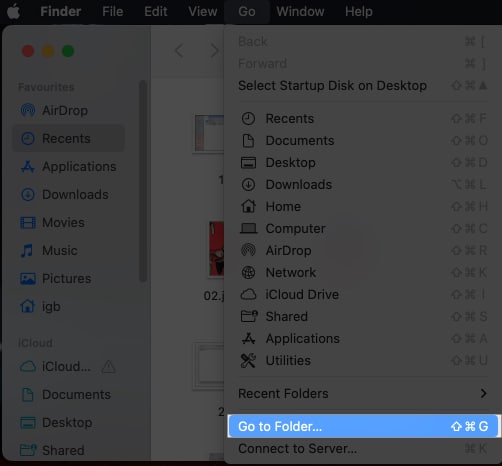
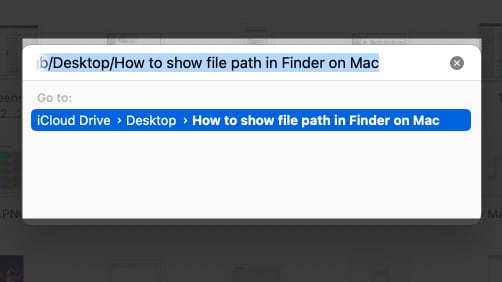
5. Go to Folder
If the above methods were too nerve-wracking, then you may use this simple drag-and-drop approach using the Finder’s Go to Folder command to see file paths. Note: You need to have multiple Finder windows open to use this feature. You have to drag and drop from one window to another.
6. Spotlight
With only a few clicks, Spotlight allows us to search for and open anything on our Mac, but by following the instructions below, we can also use it to view the file paths.
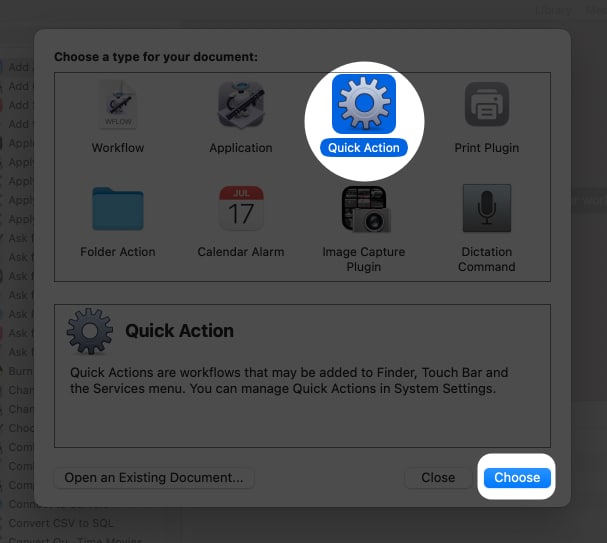
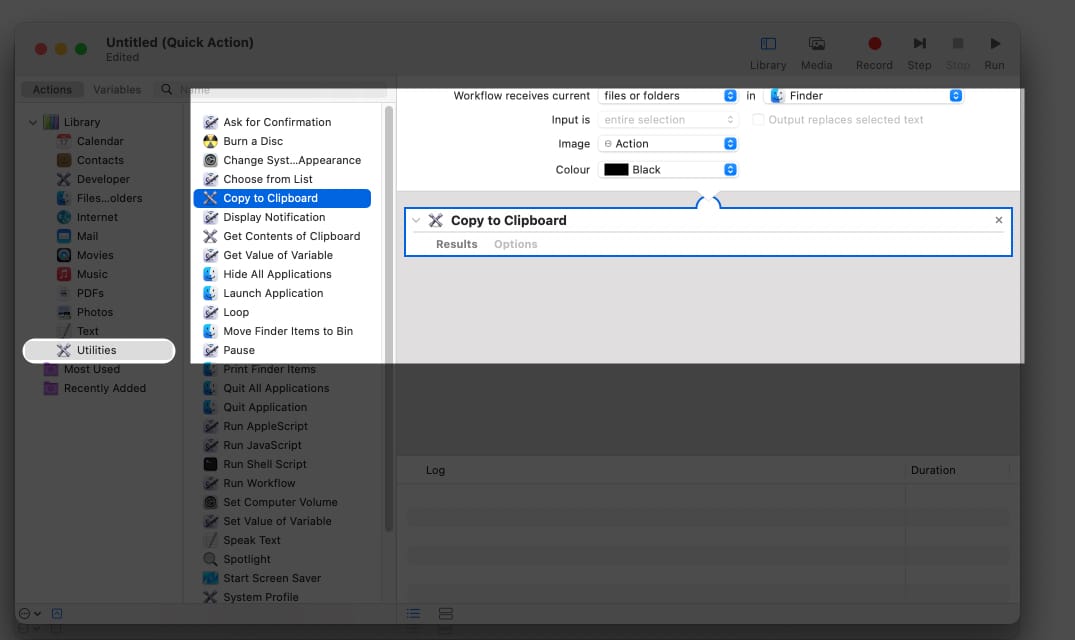
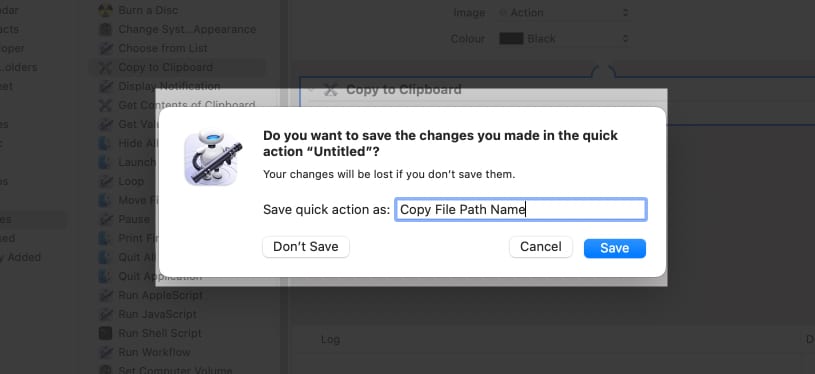
7. Automator
This small trick will be adored by shortcut enthusiasts! With the use of your Mac’s Automator, you can easily construct a variety of microservices that can carry out a wide range of tasks, like quickly obtaining any file’s file path. To make your own shortcut, follow these steps: Once you’ve created a shortcut, you can go to file → right-click → Quick Actions → [name of shortcut]. Now that the file path has been properly copied, paste it into a text editor to check the path.
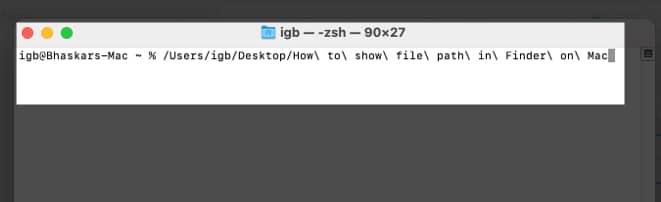
8. Terminal
One of the most powerful tools on your Mac is the Terminal, but using the feature isn’t a piece of cake. If you’re comfortable utilizing the prompt, then check out the instructions below to use your device as a pro. Make your Mac easy to navigate… It’s impossible to remember how to navigate to files and folders when there are a lot of them. Due to this, you could occasionally get annoyed and think about cleaning up your Mac. Above mentioned were some of the most basic ways to view file paths in macOS. If you have any additional suggestions, please comment below. Check more:
Finder tips and tricks every Mac user must know How to use QuickTime Player in macOS Ventura How to schedule Mac to shutdown and sleep in macOS Ventura How to batch rename multiple files on Mac